🖥️ How to Create a Virtual Host in XAMPP (Windows)
Want to access your local project via http://myproject.local instead of http://localhost/myproject?
That’s where Virtual Hosts come in!
Here’s a step-by-step guide to setting up a virtual host in XAMPP:
🛠️ Step 1: Open Apache Config File
Go to:C:\xampp\apache\conf\extra\httpd-vhosts.conf
Add this block at the bottom:
<VirtualHost *:80>
    ServerAdmin webmaster@myproject.local
    DocumentRoot "C:/xampp/htdocs/myproject"
    ServerName myproject.local
    ErrorLog "logs/myproject-error.log"
    CustomLog "logs/myproject-access.log" common
</VirtualHost>
✅ Replace "myproject" with your folder name.
📁 Step 2: Edit the Windows Hosts File
Open this file in Notepad (as administrator):C:\Windows\System32\drivers\etc\hosts
Add this line:
127.0.0.1 myproject.local🔒 Important: Save it as administrator, or it won’t update.
🧩 Step 3: Enable Virtual Hosts in Apache
Go to:C:\xampp\apache\conf\httpd.conf
🔍 Search for this line:
#Include conf/extra/httpd-vhosts.conf✅ Uncomment it by removing #:
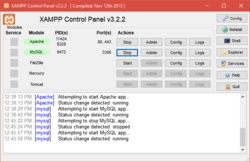
Include conf/extra/httpd-vhosts.conf🔁 Step 4: Restart Apache
Open the XAMPP control panel and click Stop, then Start next to Apache.
🎉 Now open your browser and visit:http://myproject.local — It should load your project!
💡 Bonus Tip
You can create multiple virtual hosts like:
client1.localecommerce.localportfolio.local
Just repeat the same steps and add more <VirtualHost> blocks!
🙋 Need Help with XAMPP, PHP, or Local Dev?
📧 Reach out to sktiwari.com for custom setups, internships, and full-stack development solutions.